Hello guys,here is an effective guide for fixing the random button press most people get from their ps3 controller when the cleaning with alcohol method does not work for you, before you begin i suggest being very delicate as breaking things inside the controller is too easy, i also don't take any responsibility in case you make it worse (which shouldn't happen anyway so don't worry).
This guide was prepared using my phones camera and ms paint.
The cleaning with alcohol method:
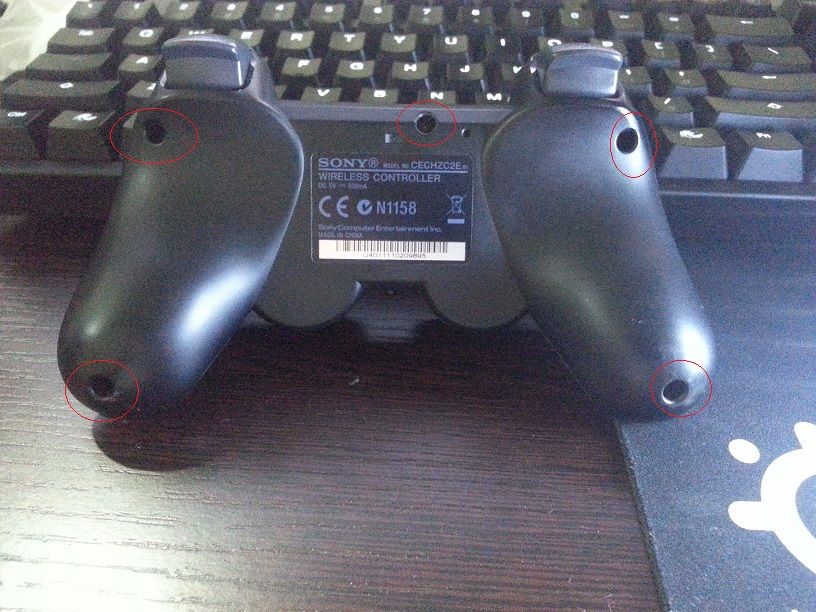
Step 1-Start by unscrewing these 5 screws.
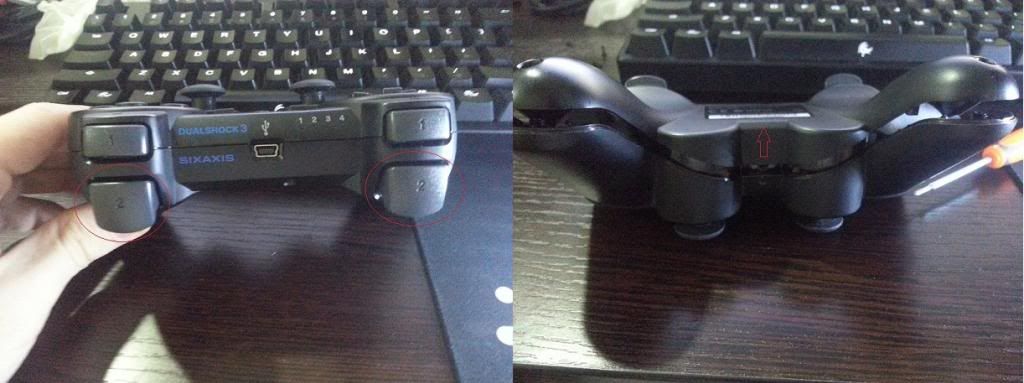
Step 2-When you are done, push the L2 and R2 buttons simultaneously and life up slowly from the other side and the shell should pop up easily.
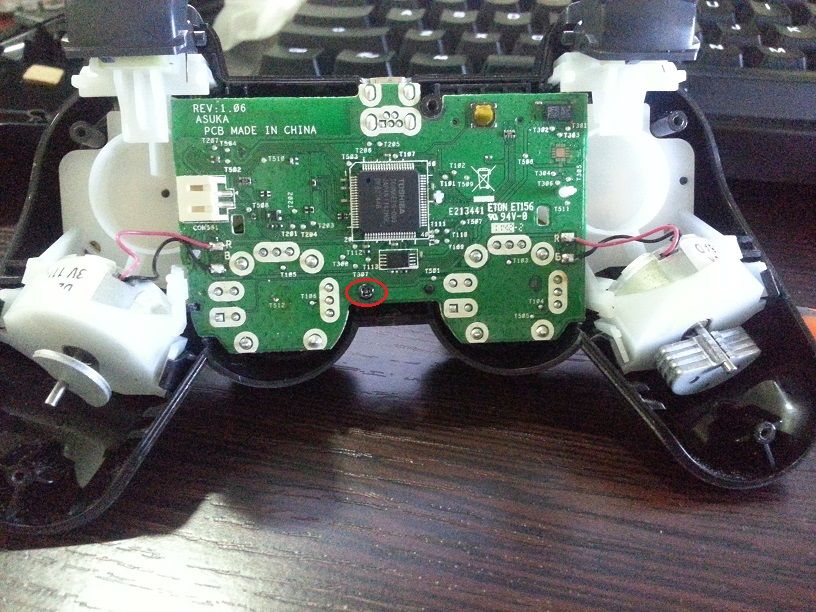
Step 3-Once you are inside there is only 1 screw that holds the board in place(which is incredibly stupid because that's the whole reason that causes this problem), anyway unscrew that also and lift up the board slowly.
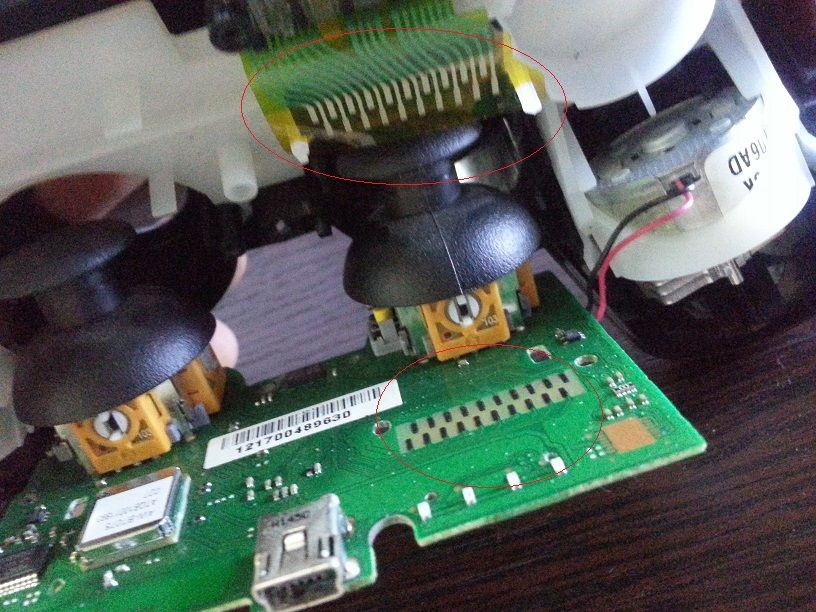
Step 4-You will come into these connectors,use alcohol to clean them and put the board back into place,put the battery back on and put the screw holding the board back on, before you put the shell back,connect your controller to your pc, go to start menu and type "controller" in the search bar, then click on "set up usb game controllers" you will see the ps3 controller there, click on it and click on properties, from there you can easily test the buttons one by one and see if they are responding well, if it works fine then great! skip to step 8 on how to close the controller.
The foam method:

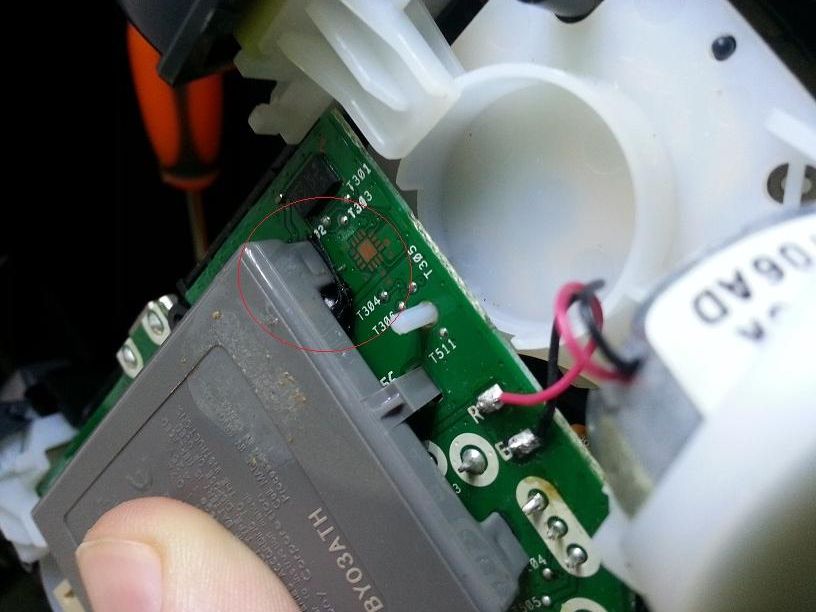
Step 5-If the steps above did not fix it then remove the board again, slowly and very carefully remove the ribbon cable, you will see a small piece of foam under there, this gets compressed over time which causes it to leave a small empty gap between the ribbon cable and the main board,buy a
thin layer of none soft foam(or 2/3 layers of electrical tape) and glue a it on there, now put the board back on and tighten that screw(not too tight tho).
Step 6-now install the battery back on but i suggest adding a few layers of electrical tape on the top right leg of the battery so that the extra pressure wont damage the board.
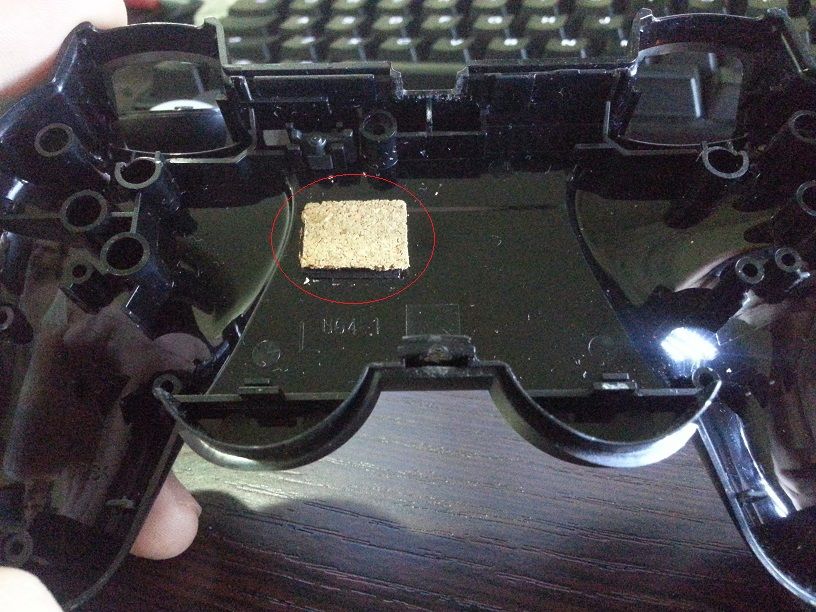
Step 7-Now take a look at the back, there is a small,thin piece of black foam, sony thought they can just put a piece of foam there to push the board against the ribbon cable (instead of adding an extra screw on the board),this also gets compressed over time, add a nice
thick layer of foam ontop of it, this will push the board against the ribbon cable and ensure contact.
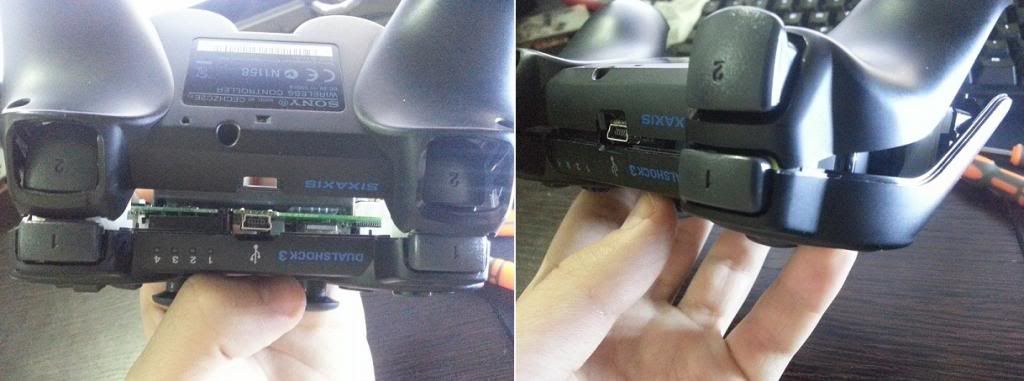
Step 8-Now put the shell back on starting from this side (without pressing the L2 and R2 buttons this time) and push down, put the screws back on, your controller should now work perfectly!.
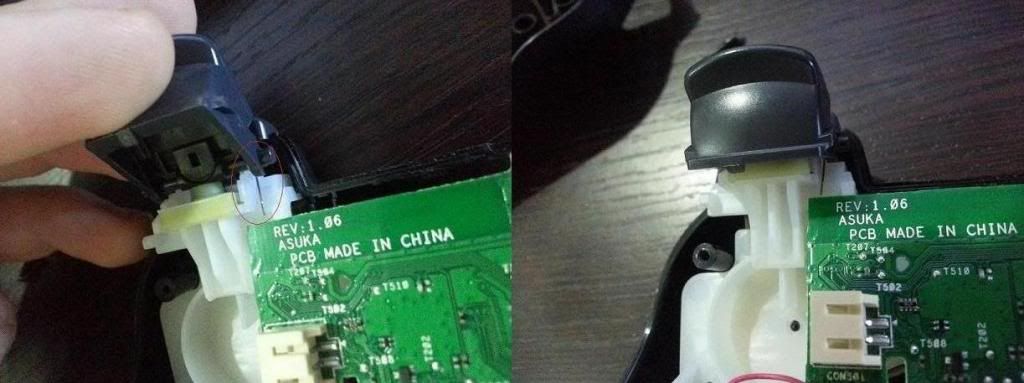
Step 9-In case one of the L2/R2 buttons fell off, this is how to put them back on (sorry the pic is taken from the wrong angle).
In case the methods above did not work or you have some buttons not responding at all then you have to clean or change the ribbon board and the key rubbers.
http://dx.com/p/replacement-board-ribbon-for-sony-playstation-3-ps3-dualshock-3-wireless-controller-5-pack-139982
http://dx.com/p/5-in-1-replacement-wireless-console-controller-key-cover-parts-for-sony-ps3-black-white-green-191507